DIY Leaf Gutter Guard Installation: Maintaining clean and functional gutters is crucial for protecting your home from water damage and ensuring proper drainage. One effective way to keep your gutters clear of leaves and debris is by installing gutter guards.
These handy devices act as a barrier, preventing leaves, twigs, and other debris from clogging your gutters while allowing rainwater to flow through freely. Not only do gutter guards save you the hassle of frequent gutter cleaning, but they also help prolong the lifespan of your gutters and prevent potential damage to your home’s foundation, walls, and roof.
This step-by-step DIY guide will walk you through the process of installing leaf gutter guards, empowering you to take on this home improvement project with confidence.
Materials and Tools Needed
Proper preparation is essential for any DIY project, and installing leaf gutter guards is no exception. Having the right materials and tools on hand not only makes the process smoother but also ensures the installation is secure and effective.
List of Materials
Selecting the right materials is the first step toward a successful gutter guard installation. The materials you choose will directly impact the durability and effectiveness of your gutter protection system.
Investing in high-quality gutter guards and the appropriate accessories ensures that your gutters remain clog-free and functional for years to come.
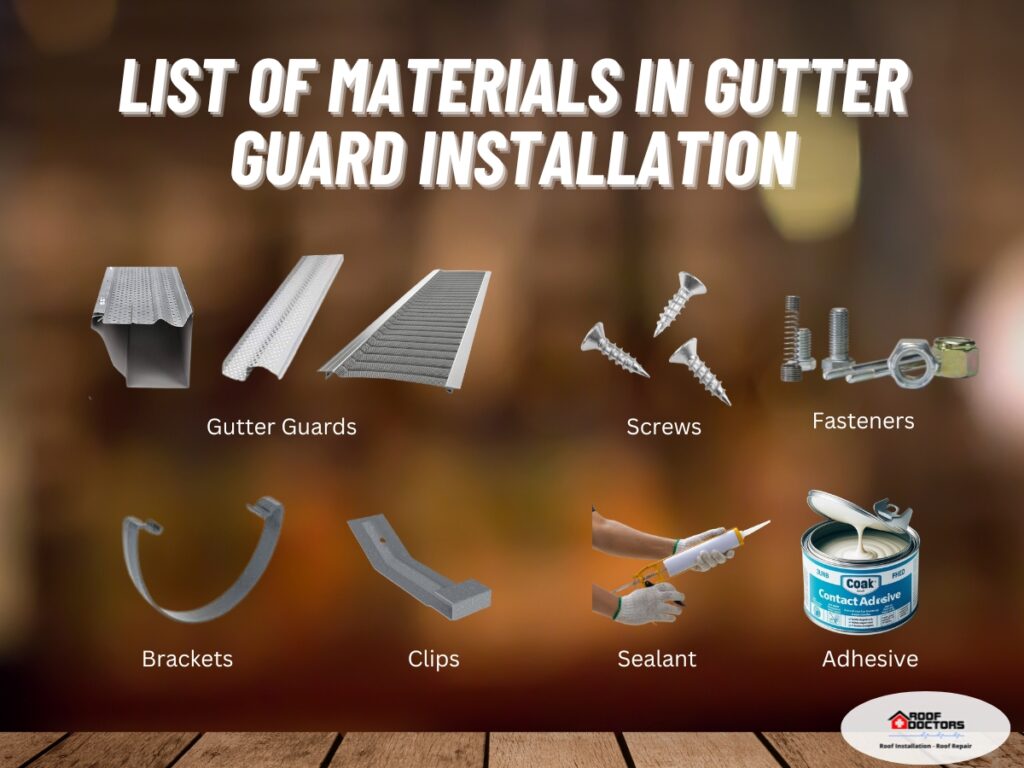
- Gutter Guards: Choose from mesh, foam, brush, or other types based on your specific needs.
- Screws or Fasteners: Necessary for securing the gutter guards in place.
- Brackets or Clips: These are used to provide additional support and stability to the gutter guards.
- Sealant or Adhesive: To ensure a watertight seal where needed.
List of Tools
Having the right tools is just as important as having the right materials. The tools you use will not only affect the ease of installation but also the safety and quality of your work.
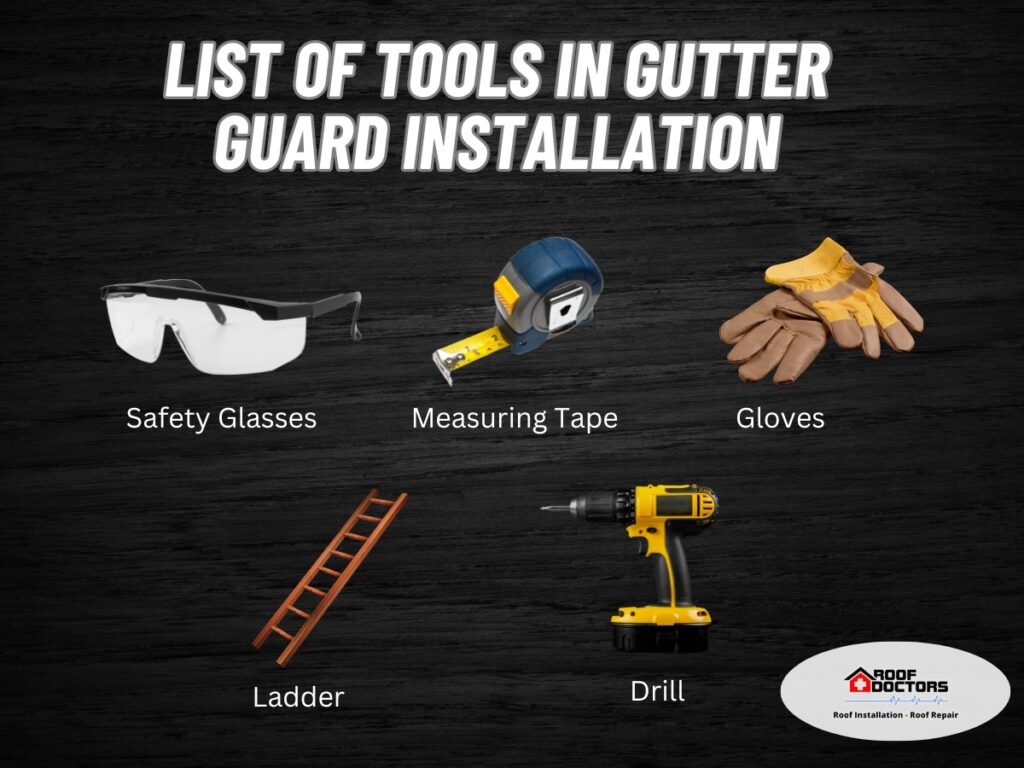
- Ladder: A stable and sturdy ladder is essential for safely reaching your gutters.
- Drill: For securing screws and fasteners quickly and efficiently.
- Measuring Tape: To measure the length of your gutters and gutter guards accurately.
- Gloves: Protect your hands from sharp edges and debris during the installation.
- Safety Glasses: Shield your eyes from dust and debris while working.
Safety Equipment
Safety should always be a top priority when undertaking any DIY project, especially those involving heights. Using proper safety equipment helps prevent accidents and injuries, ensuring that your project is completed without any mishaps.
- Safety Glasses: Protect your eyes from flying debris and dust during the installation process.
- Gloves: Keep your hands safe from sharp edges and rough surfaces.
- Stable Ladder: Ensure your ladder is in good condition and positioned securely to prevent falls.
- Non-Slip Shoes: Wear shoes with a good grip to avoid slipping while working on the ladder.
Step 1: Preparation
Preparation is the cornerstone of any successful DIY project, and installing leaf gutter guards is no different. Proper planning and thorough preparation not only streamline the installation process but also ensure the longevity and effectiveness of your gutter guards.
- Inspecting Existing Gutters
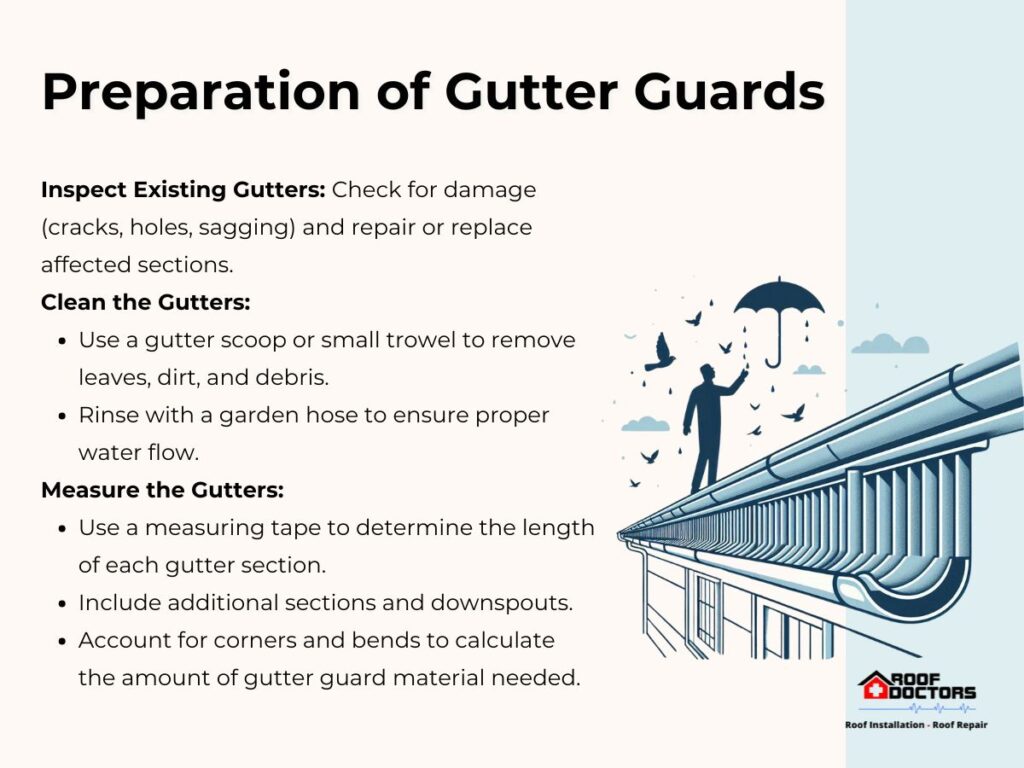
The first step in your preparation is to inspect your current gutter system. Look for any signs of damage, such as cracks, holes, or sagging sections. These issues need to be addressed before installing the gutter guards to ensure a stable and functional gutter system.
If you find any damage, consider repairing or replacing the affected sections to provide a solid foundation for the new guards.
- Cleaning the Gutters
Once you’ve inspected your gutters and identified any damage or debris, the next step is to clean them thoroughly. Use a gutter scoop or a small garden trowel to remove leaves, dirt, and other debris from the gutters.
After scooping out the debris, rinse the gutters with a garden hose to remove any remaining dirt and check for proper water flow.
- Measuring the Gutters
Accurate measurements are vital for a successful gutter guard installation. Use a measuring tape to determine the length of your gutters. This measurement will help you calculate the amount of gutter guard material you need to purchase.
Ensure that you measure each section of the gutter system, including any additional sections or downspouts that will be covered by the guards. When measuring, it’s important to account for any corners or bends in the gutter system.
Step 2: Choosing the Right Gutter Guard
Selecting the right gutter guard is a critical step in ensuring the effectiveness and longevity of your gutter protection system. With various types of gutter guards available in the market, each designed to handle different
- Mesh Gutter Guards: These guards feature a fine mesh material that blocks even the smallest debris while allowing water to pass through. They are highly effective in areas with small debris, like pine needles.
- Foam Gutter Guards: Made from porous foam, these guards fit directly into the gutter, allowing water to flow through while blocking larger debris. They are easy to install and maintain.
- Brush Gutter Guards: These guards consist of cylindrical bristles that sit inside the gutter, trapping larger debris on top while water flows through the bristles. They are ideal for areas with larger leaves and twigs.
- Reverse Curve Gutter Guards: Designed to use surface tension to direct water into the gutter while debris slides off, these guards are effective but can be more visible and may require professional installation.
- Screen Gutter Guards: Simple and cost-effective, these guards use a screen to cover the gutter, blocking larger debris. They are easy to install but may require frequent cleaning.
Step 3: Installing the Gutter Guards
Installing gutter guards is a straightforward process that, when done correctly, can save you time and money on gutter maintenance. Proper installation ensures that your gutters remain free of debris, allowing rainwater to flow smoothly and protecting your home from water damage.
Installing Mesh Gutter Guards
Mesh gutter guards are popular due to their ability to block small debris while allowing water to flow through. Here’s how to install them:
- Measure and Cut: Measure the length of each section of your gutter and cut the mesh gutter guards to fit using tin snips.
- Position the Guard: Place the mesh guard over the gutter, ensuring it covers the entire width and sits securely on top of the gutter.
- Secure the Guard: Use screws or clips to secure the mesh guard in place. Start at one end and work your way to the other, ensuring the guard is taut and evenly positioned.
- Seal the Edges: Apply a bead of sealant along the edges where the guard meets the gutter to ensure a watertight seal and prevent debris from slipping underneath.
Installing Foam Gutter Guards
Foam gutter guards are easy to install and provide effective protection against large debris. Follow these steps:
- Cut the Foam: Measure the length of the gutter and cut the foam guards to size using a sharp utility knife.
- Insert the Foam: Insert the foam guards into the gutter, ensuring they fit snugly along the entire length. The foam should fill the gutter without any gaps.
- Adjust as Needed: Press the foam guards firmly into place, making any necessary adjustments to ensure a secure fit.
- Check for Gaps: Ensure there are no gaps between the foam guard and the sides of the gutter, as debris can enter through these spaces.
Installing Brush Gutter Guards
Brush gutter guards are designed to sit inside the gutter and catch debris on their bristles while allowing water to flow through. Here’s how to install them:
- Cut to Length: Measure the length of the gutter and cut the brush guards to fit using a utility knife or scissors.
- Insert the Brush: Place the brush guard inside the gutter, ensuring it fits snugly along the entire length. The bristles should point upwards.
- Secure the Position: Make sure the brush guard is evenly positioned and does not shift. In some cases, you may need to secure it with clips or ties.
- Trim Excess: If the brush guard extends beyond the end of the gutter, trim the excess to fit perfectly.
Installing Reverse Curve Gutter Guards
Reverse curve gutter guards use surface tension to direct water into the gutter while debris slides off. Here’s how to install them:
- Measure and Cut: Measure the length of the gutter and cut the reverse curve guards to size using tin snips or a utility knife.
- Position the Guard: Place the reverse curve guard over the gutter, ensuring it follows the curve of the gutter.
- Attach to the Roof: Secure the upper edge of the guard to the roof using screws or adhesive, depending on the manufacturer’s instructions.
- Secure to the Gutter: Attach the lower edge of the guard to the gutter with screws or clips, ensuring it is securely fastened and follows the gutter’s shape.
Installing Screen Gutter Guards
Screen gutter guards are simple and effective for blocking larger debris. Here’s how to install them:
- Cut to Size: Measure the length of the gutter and cut the screen guards to fit using tin snips.
- Position the Screen: Lay the screen guard over the gutter, ensuring it covers the entire width and sits securely on top.
- Secure with Clips or Screws: Use clips or screws to attach the screen guard to the gutter. Start at one end and work your way to the other, ensuring the guard is taut and evenly positioned.
- Check for Stability: Ensure the screen guard is firmly in place and does not shift. Make any necessary adjustments for a secure fit.
Step 5: Final Inspection and Maintenance Tips
Completing the installation of your gutter guards is a significant achievement, but the process doesn’t end there. To ensure your gutter guards continue to function effectively and provide optimal protection for your home, it’s essential to perform a final inspection and establish a regular maintenance routine.
Final Inspection
After installing the gutter guards, it’s crucial to conduct a comprehensive inspection to ensure everything is in place and functioning as expected.
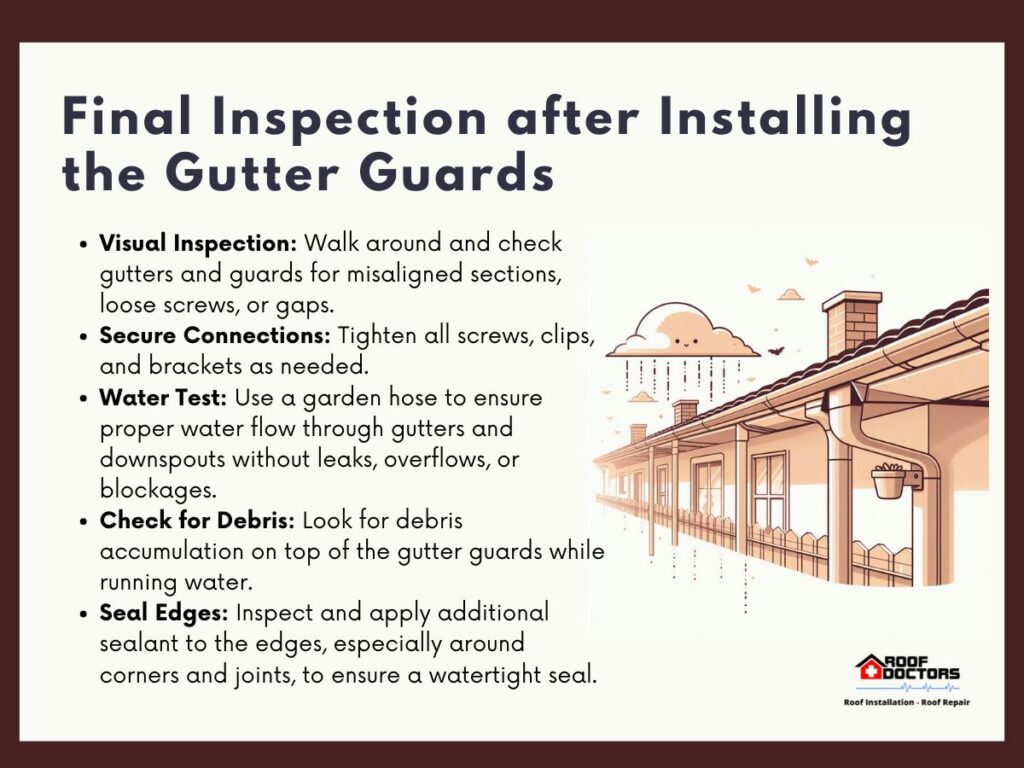
- Visual Inspection: Walk around your home and visually inspect the gutters and guards. Check for any misaligned sections, loose screws, or gaps that could allow debris to enter.
- Secure Connections: Ensure all screws, clips, and brackets are tightly secured. If you find any loose connections, tighten them using the appropriate tools.
- Water Test: Use a garden hose to run water through the gutter system. Observe how the water flows through the gutters and downspouts, ensuring there are no leaks, overflows, or blockages.
- Check for Debris: While running the water, look for any signs of debris accumulation on top of the gutter guards. This can help you identify areas where debris may still be getting through.
- Seal Edges: Inspect the edges of the gutter guards and apply additional sealant if needed to ensure a watertight seal, especially around corners and joints.
Maintenance Tips
Regular maintenance is key to keeping your gutter guards in optimal condition and ensuring they perform effectively year-round.
- Periodic Cleaning: Although gutter guards significantly reduce debris buildup, some debris may still accumulate over time. Periodically check the tops of the guards and remove any leaves, twigs, or other debris to prevent blockages.
- Seasonal Inspection: Conduct a thorough inspection of your gutter guards at least twice a year, preferably in the spring and fall. This helps you identify and address any issues before they become major problems.
- Monitor Water Flow: During heavy rainstorms, observe the water flow from your downspouts. Consistent water flow without overflow indicates that the gutter guards are functioning properly.
- Trim Overhanging Branches: To minimize debris falling into your gutters, regularly trim any tree branches that hang over your roof. This reduces the amount of leaves and twigs that can accumulate on the guards.
- Check for Damage: After severe weather events, inspect your gutter guards for any damage caused by strong winds, hail, or heavy snowfall. Repair or replace any damaged sections promptly to maintain protection.
Choosing the Right Gutter Material for Your Home
Installing leaf gutter guards yourself is a rewarding project that can significantly reduce the maintenance required for your gutters while protecting your home from water damage. With proper preparation, measurement, and secure installation, you’ll have a functional and durable gutter system that withstands the elements.
An important aspect to consider in any gutter guard installation project is the material of your gutters. For instance, certain materials like aluminum, vinyl, or copper may require specific types of guards or installation methods.
When you know the properties of your gutter material, you can make more informed decisions about the type of leaf gutter guards to install and how to maintain them effectively. This integration of material knowledge with DIY installation ensures that your gutter system remains robust and efficient, protecting your home for years to come.


