")
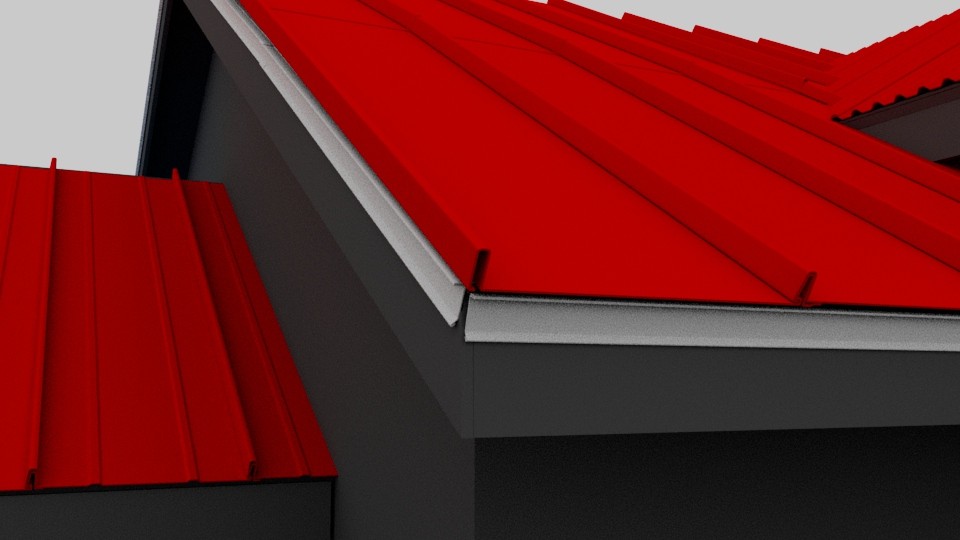
Drip edges are incredibly useful, but many people need help figuring out how to install them or how they work. What is a drip edge? A drip edge is metal flashing that safeguards the roof and structure, diverts water, and improves roof aesthetics.
Since 1987, The Roof Doctors has provided comprehensive roofing services, including its installation, to our valued customers. This article will help you grasp your roof’s components, such as the drip edges, by the end.
What are the types of drip edges?
There are several types of drip edges that can be used in roofing, each with its own unique features and benefits. The type of drip edge that is best suited for a particular roofing project will depend on a variety of factors, including the type of roof, the style of the building, the budget, and the specific needs and requirements of the project.
They can be made of various materials, such as aluminum, galvanized steel, or PVC. Still, aluminum is the most common material used due to its durability, corrosion resistance, and low cost. Some of the most common types of drip edges include:
Standard Drip Edge:
This is the most common type of drip edge and is typically made of aluminum or galvanized steel. Standard drip edges are typically L-shaped, with a flange extending out from the roof’s edge and a leg extending down the roof. Additionally, these drip edges are typically installed along the eaves and the rakes of the roof. Their purpose is to direct water away from both the roof and the building.
Wide Flange Drip Edge:
This type of drip edge is similar to a standard drip edge but has a wider flange that extends out from the roof’s edge. The wider flange serves to offer extra protection against water infiltration. Additionally, it enhances the overall aesthetic appeal of the roof.
Fascia Drip Edge:
The drip edge is intended for installation along the fascia, which is the vertical board located at the roof’s edge. It should not be installed along the eaves or the rakes.
Fascia drip edges are commonly employed in situations where eaves or rakes are not easily accessible. They are also used to redirect water away from the fascia.
Stamped Drip Edge:
This type, made of aluminum or galvanized steel, is designed to resemble wood or other natural materials. Stamped drip edges are typically used in residential and commercial buildings, where a more natural or rustic look is desired.
Plastic Drip Edge:
This type of drip edge is made of PVC or other plastic materials and is a more affordable alternative to metal drip edges. Plastic drip edges offer durability and corrosion resistance. However, they may not be as robust as metal drip edges and might not suit all roofing applications.
Custom Drip Edge:
This type of drip edge is designed and fabricated to meet a particular roofing project’s specific needs and requirements. Furthermore, custom drip edges can be made of various materials and tailored to match the style and color of both the roof and the building.
It is important to work with a reputable and experienced roofing contractor to ensure that the right type of it is selected and installed correctly. How can you ensure your drip edge is installed correctly?
Where are drip edges installed?
Drip edges are usually installed as part of the roofing process and are typically included in the roofing project cost. However, it is also possible to install drip edges as a separate project, especially if the roof is being replaced or repaired. In either case, hiring a reputable and experienced roofing contractor is crucial. They ensure correct installation of drip edges to meet the highest standards.
Drip edges should be placed along the roof’s eaves (the horizontal edge of the roof where it meets the wall) and the rakes (the vertical edges of the roof). They should be installed at the right height and in a way that allows them to overlap with the flashing.
Drip edges should be installed such that the bottom edge of the drip edge is flush with the roofing material. If it is installed too high or too low, it may not effectively direct water away from the roof and the building.
What more?
Drip edges should be properly positioned in alignment with the flashing. Additionally, the flashing acts as a protective layer covering joints between the roof and other building components. Furthermore, the drip edge is usually placed over the flashing to provide a watertight barrier, preventing water from entering the roof or building.
It should overhang the flashing to prevent the roof from water infiltration. The drip margins’ size and placement depend on the roof’s size and slope and any special needs.
Drip edges are typically installed along the eaves and the rakes. They can also be installed along the fascia, which is the vertical board at the roof’s edge. Fascia drip edges are typically employed in situations where the eaves or rakes are not easily accessible. They are also used when there is a need to direct water away from the fascia..
How are drip edges installed?

Now that you know what drip edges are and where they should be installed, how are they installed?
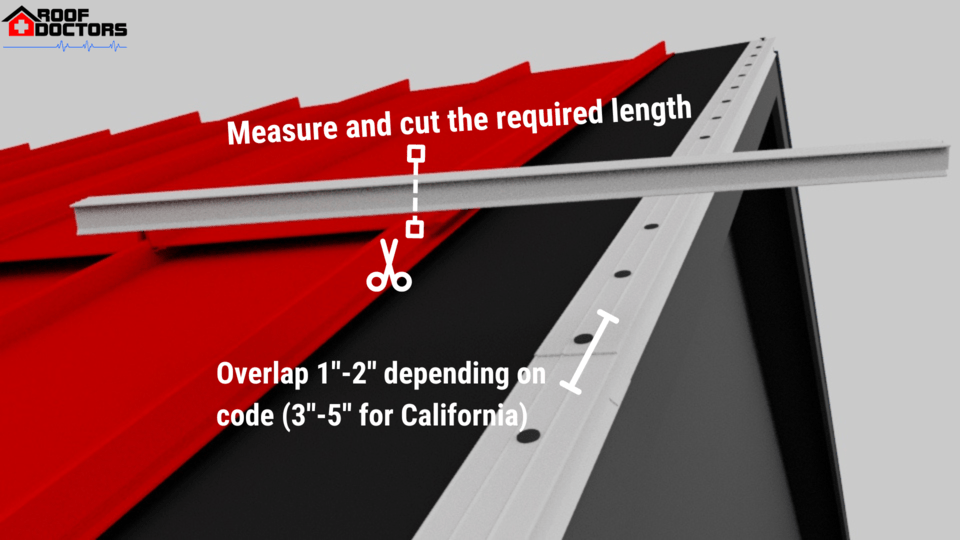
- To install a drip edge, the roofing contractor will typically start by measuring and cutting it to the appropriate length. It is then secured to the roof using nails or screws, with the bottom edge flushed with the roofing material.
- The contractor will install flashing, a protective material covering joints between the roof and other building components, along the roof’s edge. The drip edge goes over the flashing. This process ensures a watertight seal, preventing water from seeping behind the drip edge and into the roof or the building.
Another important consideration when placing drip edges is the size and slope of the roof. It may be necessary to install drip edges along the rakes on steep roofs to direct water away from the roof and the building.
In some cases, it may be sufficient to install drip edges only along the eaves on flat or low-sloped roofs. However, drip edges are sized according to roof size and slope. Larger roofs may require wider or longer drip edges to effectively divert water from the roof and building.
DIY installation of a Drip Edge
The installation of a drip edge is typically performed by a roofing contractor, but if you want to DIY install it, the process usually involves the following steps:
- Measure the length of the eaves and rakes of the roof to determine the length of drip edge needed.
- Cut the drip edge to the appropriate length using a pair of tin snips. Install the drip edge along the roof’s eaves, extending it at least half an inch beyond the roof’s edge or flush with the trim board, depending on the roof type.
- Nail the drip edge in place using roofing nails or other appropriate fasteners (in California, the drip edge pieces are overlapped 3-5 inches).
- Install flashing along the rakes of the roof to channel water away from the edge of the roof if necessary. Shingle roofs typically have drip edges on eave and rake edges, but some tile roofs may lack drip edges or rake edge flashing.
- Install the roofing material over the drip edge, ensuring that it overlaps the drip edge by at least half an inch. Some materials, such as tile underlayment, are installed first, and the drip edge is installed over the underlayment.
Why install a drip edge?
Next, we’ll look at the reasoning behind their installation after learning what they are, how they’re installed, and where they’re placed. Drip edges are usually installed at the eaves and the rakes to direct water away from the roof and the building (flashing), which helps to protect the roofing material, the structure of the building, and the foundation. Installing a drip edge is a building code that must be followed for the roof to pass inspection.
During rain, water flows down the roof, striking the drip edge, redirecting it away from the roof and the building. Accumulated water on the roof or edges can harm roofing material, the building’s structure, and its foundation, necessitating prompt attention. Accumulated roof water can foster mold and harmful bacteria, jeopardizing both the roof’s integrity and the building’s structural health.
Another important function of a drip edge is to enhance the overall aesthetic appeal of the roof. Drip edges can be a subtle yet effective way to add visual interest to the roof and the building. Customizing them to match the roof and building style and color creates a cohesive and attractive appearance for the structure.
What can installing one help me avoid?
A drip edge is critical in protecting a roof’s integrity and the building it covers. Without a drip edge, water can seep underneath the roofing material and cause a range of problems, including:
- Rotting of the roof deck: Water that penetrates the roof can cause the wood decking to rot, weakening the roof’s structure.
- Mold and mildew growth: Water that accumulates underneath the roof can lead to the growth of mildew and mold, which can lead to health problems and damage to the building.
- Damage to the interior of the building: Water that seeps through the roof can cause damage to the interior of the building, including walls, ceilings, and insulation.
How is a drip edge maintained?
Once the drip edge is installed, it is important to maintain it to continue functioning properly. This typically involves regularly inspecting the drip edge for any signs of damage or wear and tear and repairing or replacing it as needed.
Maintaining a drip edge is essential to keep it clean and free of debris. This can be done by sweeping or blowing off leaves and other debris that accumulate on it. In addition, it is a good idea to inspect the drip edge regularly for any signs of damage or wear, such as cracks, dents, or rust. Damage should be addressed promptly to prevent water infiltration and additional roof deterioration, necessitating either repair or replacement.
It is also important to check the surrounding areas of the drip edge, such as the gutters and downspouts. To maintain proper water drainage and ensure the drip edge’s effectiveness, routinely clean and maintain these crucial roof components.
Can a faulty drip edge cause a roof leak?
Yes, a faulty or damaged drip edge can potentially cause a roof leak. The drip edge is a flashing component that is installed at the edges of a roof, typically along the eaves and gables.
It prevents leaks by diverting water from the roof to the ground. Water may leak into the roof structure if the drip edge is not working properly.
There are several ways in which a drip edge can become faulty or damaged. For example, it may be damaged by strong winds or hail or become damaged over time due to exposure to the elements. In addition, a it may be improperly installed, causing it to be ineffective at directing water away from the roof.
If you suspect a malfunctioning or damaged drip edge is causing your roof leak, fix it immediately. A roofer can evaluate the drip edge, assess the source, and offer repairs or replacements.
Neglecting a faulty drip edge can cause additional roof and interior home damage, emphasizing the need for prompt resolution. Learn the 5 most common roof leaks to prevent leaks in your roof in our detailed article.